[Fun] Cardboard Ironman
Last update: 1-Nov-2016
I have always been a fan of Ironman -- mischievous and ingenious engineer building his own suit to do superhero stuff. Ever since the movie hit the theatres, there have been numerous people trying to build the suit themselves. Some very resourceful people even built the entire body suit from top to bottom, yet most people would start with the helmet, as it's pretty iconic, thus instantly recognizable, and costs way less. There is also a great variety of materials and techniques employed, from paper to bondo, and from handmade to 3D printed. To be honest I was very close to 3D printing one for myself.
However, the quality of a 3D printed helmet varies greatly in quality, and you'll have to assemble the parts. So in terms of ease you don't really get much from the printing process, which will also cost you a fortune because of the shape and hollowness of the helment. This is why I decided to look for a paper template. And boy-o-boy there were plenty of those in the internet.
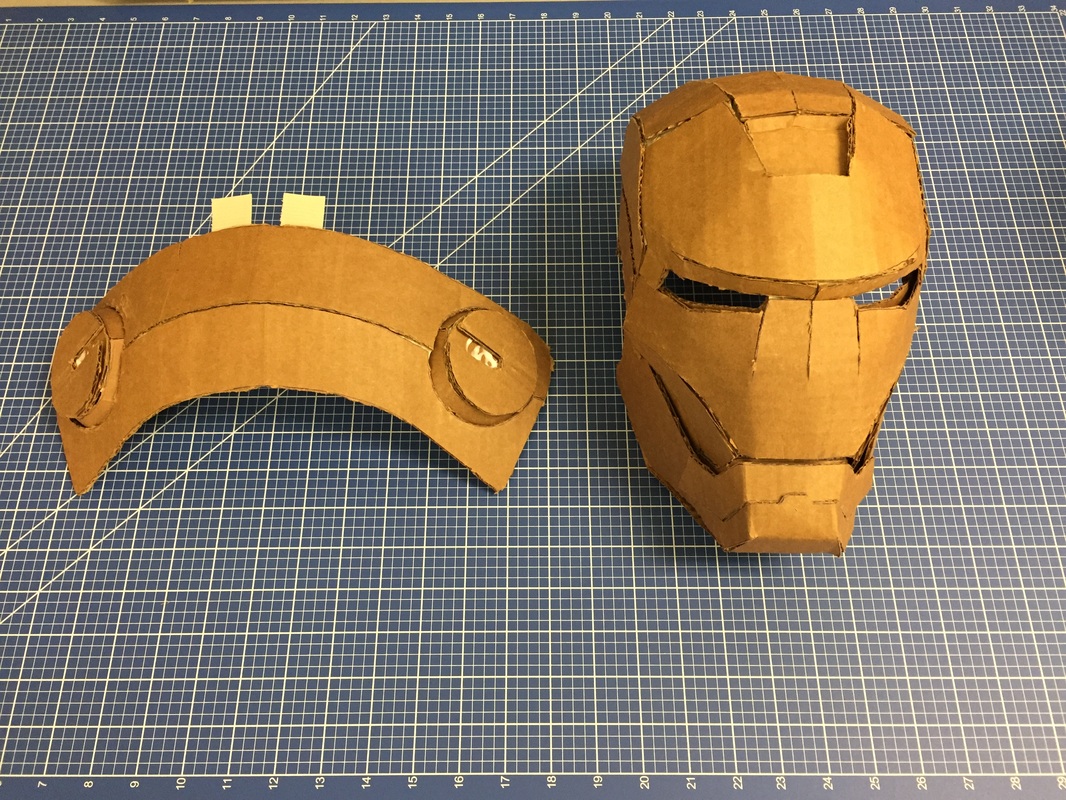
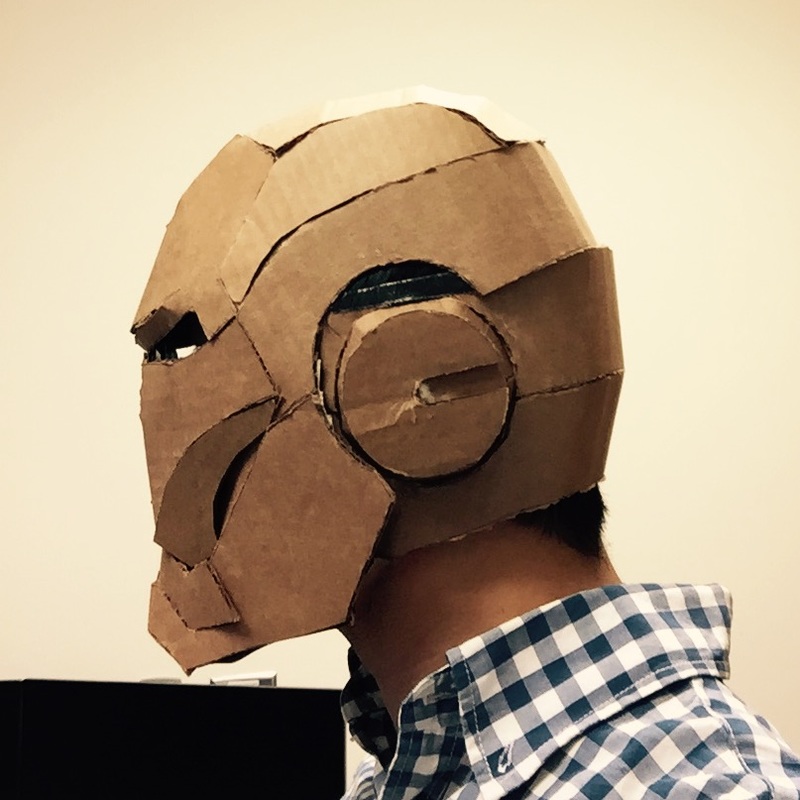
So I took an afternoon, sat down, did some Google search, and found a decent one. It also happened that there was a big corrugated box in my lab. Skipping the step-by-step illustration, which doesn't really tell much, here is the final product.
I have always been a fan of Ironman -- mischievous and ingenious engineer building his own suit to do superhero stuff. Ever since the movie hit the theatres, there have been numerous people trying to build the suit themselves. Some very resourceful people even built the entire body suit from top to bottom, yet most people would start with the helmet, as it's pretty iconic, thus instantly recognizable, and costs way less. There is also a great variety of materials and techniques employed, from paper to bondo, and from handmade to 3D printed. To be honest I was very close to 3D printing one for myself.
However, the quality of a 3D printed helmet varies greatly in quality, and you'll have to assemble the parts. So in terms of ease you don't really get much from the printing process, which will also cost you a fortune because of the shape and hollowness of the helment. This is why I decided to look for a paper template. And boy-o-boy there were plenty of those in the internet.
So I took an afternoon, sat down, did some Google search, and found a decent one. It also happened that there was a big corrugated box in my lab. Skipping the step-by-step illustration, which doesn't really tell much, here is the final product.
|
|
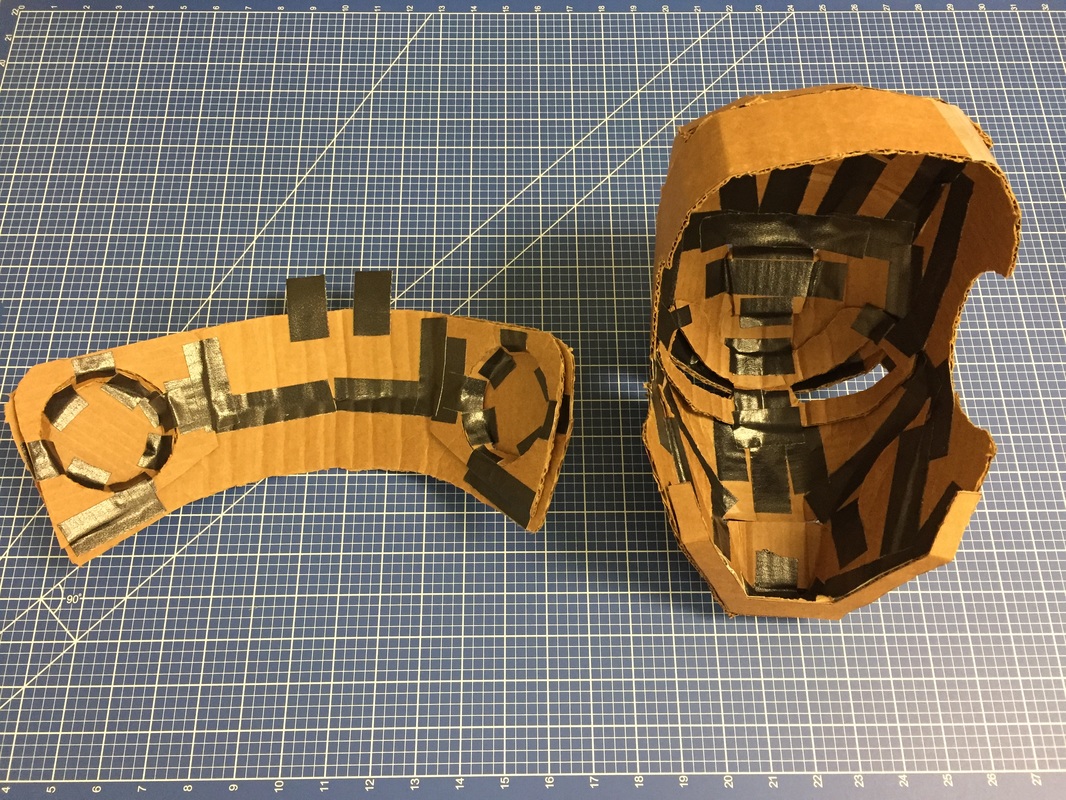
The instructions were very simple, just sticking a bunch of pieces together. But there were over 15 pieces so I had to use a lot of duct tape. In the end there were two big pieces to be attached to each other to form a closable helmet.
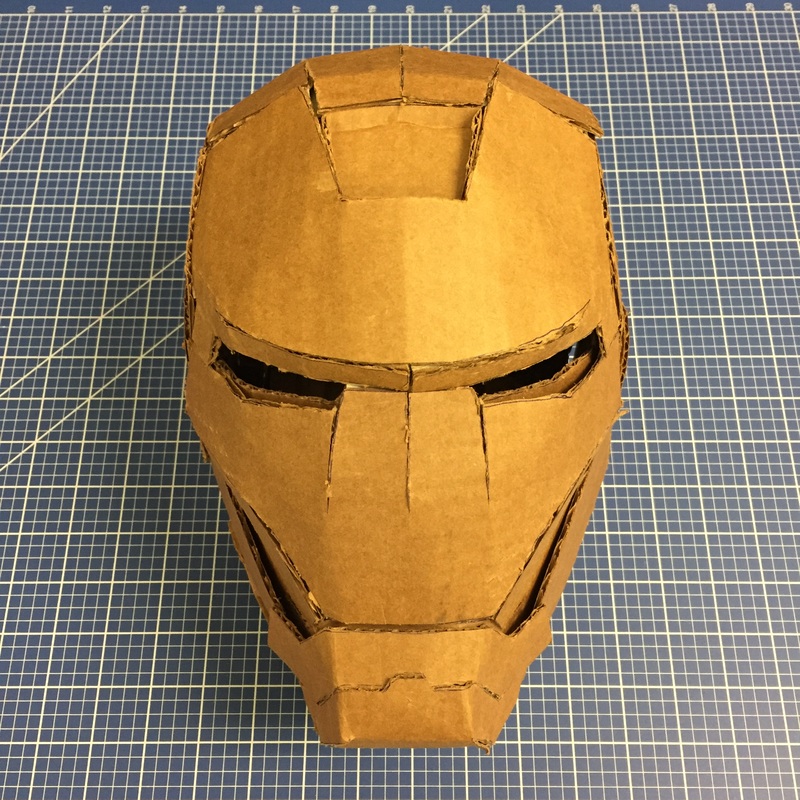
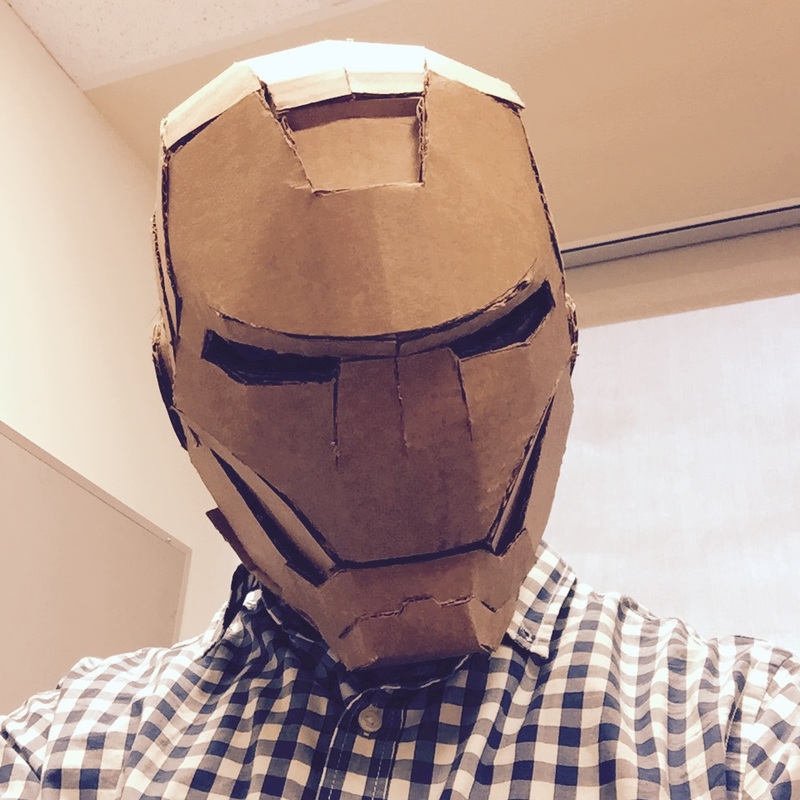
And the helmet was surprisingly comfortable. The eye piece was also well-positioned so I could see outside. On a sunny day I might just put it on and bike around my neighbourhood or campus.
And the helmet was surprisingly comfortable. The eye piece was also well-positioned so I could see outside. On a sunny day I might just put it on and bike around my neighbourhood or campus.
|
|
|
Overall I'm pretty happy with how this 5hr project turned out. Had I have access to better materials and a laser cutter I would have a better one made much quicker. But it's free so I can't really complain much.
Since I did not come up with the design, I cannot share the template here. But this is the link I got the template in PDF: http://www.papercraftsquare.com/life-size-iron-man-helmet-papercraft-free-download.html
If you are interested, feel free to make one for yourself, and let me know how it turns out!
